Sign up to the Brew Mart newsletter for the latest news, offers & more
Happy Easter from Brew Mart!
Brew Mart will be closed on Good Friday & Easter Monday. Open Saturday 19th as usual.
Home Brewing Starter Kits
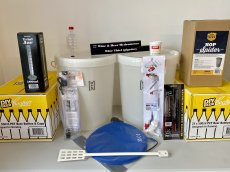
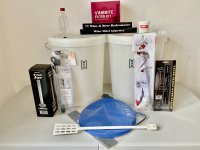
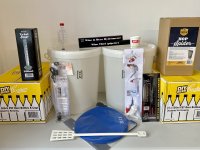
Essential brewing equipment put together as a complete home brewing starter kits to enable you to brew a beer, wine, cider, Lager or spirits in your own home.
Purchasing the essential homebrew equipment from Brew Mart as a homebrew starter kit works out as much better value than buying each item separately
Check out our Handy Hints and Tips guides and Starter Kit Instructions here
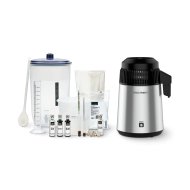
Still Spirits Air Still Mini Distillery Kit also known as Air Still Essentials Kit (UK)
Home Brewing Starter Kits - Essential home brewing equipment.
You are interested in home brewing but are unsure where to start or what equipment you will need. Look no further. Brew Mart will fill in all the gaps and help you on your way with this truly fantastic hobby with our beginner homebrew starter kits
Home brewing has never been such good value and you can produce great tasting beers, wines, ciders, lagers or spirits, there is no need to pay supermarket prices.
As with many hobbies, you can be drawn into spending a lot of money on equipment, but this is not necessary and to begin with, you need very little. You can pick up a beginner home brew kit for as little as £25. The beginner home brew kit will have all the equipment to make your first brew, and they are reusable. This will make your subsequent brews even better value.
The principles may be slightly different between wine, beer, cider lager and spirits. However, what the brewer is trying to achieve is the same. For example, to bring out the flavours from fruit such as apples or grapes in the case of wines and spirits or malt in beers. Next, introduce yeast to produce alcohol. Brewing is one of the oldest pastimes and once you start there is nothing to stop you making any of your favourite drinks from ginger beers right through to whiskies.
Before you start consider where you will be working, the kitchen is the obvious choice as you will need quite a bit of space when using large containers. Most homebrewing beer kits make forty pints at a time, which can make the fermenter pretty heavy when full. If brewing beer from grain, you will also be dealing with hot sticky liquid.
The main rule with homebrew is cleanliness, as any bacteria can and will ruin your brew. Cleanliness should not be a problem as steriliser is available at all homebrew shops.
Methods for brewing beer
- Using a beer kit is the simplest method, and it suits most home brewers as all the guesswork is removed. You know you will achieve the same result you know and love each time you brew. These kits vary in price according to how much malt they contain. The malt also contains some hop extract, so there is no need to boil. You only need to add water to dilute the malt, following the instructions on the packaging. Allow to ferment, and when ready, bottle. All the equipment you will need is in Brew Mart's best beginner Home Brew Kit
- Extract brewing. You can purchase malt either as a syrup in a can or powder in a package. You can then rule out the mash stage, which makes brewing using this method much more straightforward. However, during the boil, don’t forget to add some hops.
- All grain brewing by far the most versatile and worthwhile if you get it right, but it can be a real headache. The range of recipes is mind-blowing, and you can also experiment and make your own. There are a few more stages to go through.
- Mash, which is a process of steeping the malted grain to bring out the sugar.
- Sparring is a method that rinses the grain to make sure that all the sugar has come out of the grain and none is lost.
Methods for wine and cider making
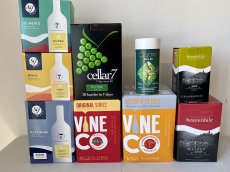
- Homebrew wine kits produce excellent wine. These kits usually contain the correct varietal grape juice and yeast for the type of wine you wish to create. Kits are the most straightforward way to start winemaking. All the equipment you will need is in the best Home Brew Starter Kit
- You can use fresh fruit. This method takes longer as the fruit has to be crushed before fermenting. You will also need more equipment as the juice will need to be transferred over to a new vessel at some stage to take it off the sediment.
- Whether you have used a kit or fresh fruit, wines and cider benefit from maturing, cider needs at least four months, and wine will taste much better if you can leave it for a year.
- As with beer, sparkling wine and cider will need pressure-safe bottles. Wine or cider will still be pretty safe in ordinary wine bottles as long as they are well sealed.
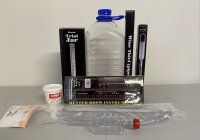
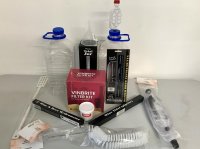
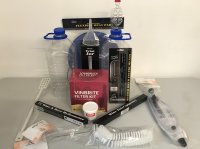
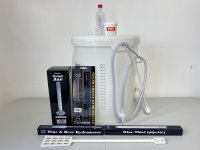
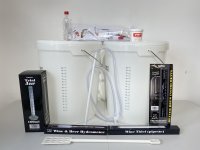
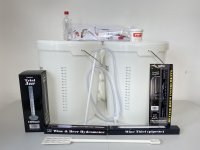
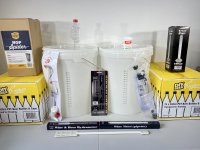
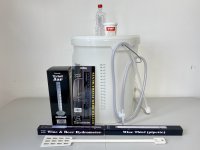
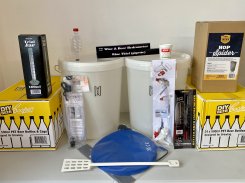
The best home brew starter kits usually contain this equipment
- A fermenter, for you to use when beer, wine, cider or spirit making
- Fermenter lid with hole and grommet
- Cleaner/steriliser essential when home brewing to keep all the equipment clean
- Hydrometer to measure the density of your brew
- An airlock to keep the air out and indicates the progress of the fermentation.
- A thermometer to keep a check on the temperature of your brew
- A syphon to syphon your brew into a new container, e.g. barrel or bottles.
- A long-handled spoon or paddle
- Instructions on how to use the homebrew starter kits
These separate items can be purchased as a home brew starter kit from Brew Mart, making it cheaper than buying them individually. Once purchased, the equipment is available to be used repeatedly, which makes brewing very affordable.
Most people opt for the food-safe plastic 25 litre capacity as this will allow for most beer, wine or cider kits, leaving a little room for the headspace needed during the fermentation period. It is advisable also to purchase a lid to keep your brew safe and not allow bacteria to enter your brew. Lids can be purchase either solid or with a grommet. A solid lid is suitable for storing, but a lid for fermenting needs a grommet to fit the airlock.
You can also use demijohns or carboys of various sizes available with either a glass or food-safe plastic.
The glass looks good but can be pretty heavy, and the shape of the demijohn and carboy is not so easy to clean.
The airlock is an excellent piece of equipment. Fill with a small amount of water, and it stops any air from getting into your brew but allows the CO2 to escape.
The stirrer needs to be long-handled due to the size of the fermenter. You will need to be able to reach the bottom of the vessel. These come in food-grade plastic or stainless steel and can be either a paddle or spoon. It is not a good practice to use anything wooden as microbes that could harm your brew could be lurking.
The process of fermentation.
Once the brew kit is made up and is in the fermentation bucket as instructed, the yeast is then added, the lid with the airlock attached is placed on the fermenter and sealed well. The airlock is half-filled with water, do not overfill it as the escaping gas will force it out.
Ensure that the fermentation bucket is not in direct sunlight, and the temperature needs to be between 17C to 25C for the optimum working temperature for the yeast. The first fermentation stage can be rather vigorous; however, covering the fermentation vessel with a damp towel should calm it down if it is too strong. Take care in hot weather as the yeast can be overstimulated, resulting in undesired flavours.
The stages of fermentation
Fermentation takes about two days to become noticeable. The first sign is foam appearing at the top of the liquid and bubbles appearing in the airlock as the carbon dioxide escapes. The bubbling rate will decrease, and the form will subside after roughly seven days. Once everything is quiet, you are ready to bottle your brew. The hydrometer is an excellent tool to use at the beginning and end of your brew.
Click here to see how to use the hydrometer.
During fermentation, it is not a good idea to move the fermenter as the sediment which develops during brewing must be allowed to settle and not be disturbed.
To help you decide how you wish to store your brew, please read
should you use bottles or barrels?
Click here to read how to bottle your brew.
Click here to read How to brew beer
You may also like
A guide to brewing

